Stuff: Trek Pak

Whether you are taking photos for a hobby or a profession, it’s expensive. A working photographer can make investments of $15k to $20k+ into their cameras, lenses, lighting, computers, and all the bits and bobs that go with it. Don't even ask about medium format. Because of this there is one thing that all serious and professional photographers have in common: a concern for the protection of their gear. There are a few options available in the market but there is one name synonymous with professionals and that’s Pelican. Pelican is the gold standard for protective cases. They are crush and dust proof, as well as watertight thanks to an o-ring seal and an automatic pressure equalization valve. Quite simply, they take a bashing and are backed by a lifetime guarantee that you hope you’ll never need.
Over the years I’ve had a few different Pelican cases but I’ve settled very well into the Pelican 1550. Why? It’s a medium sized case that’s easy to carry and has space for all my gear. It’s also small enough that I can carry it onto a plane or throw into a trunk, and unlike the popular Pelican 1510, I don’t loose space in the corners for the wheels. As popular and proven as they are, Pelican cases are not without their faults. In my opinion, the supplied internal foam is merely adequate. When it came time to do something about the state of my Pelican case I wanted to find a better answer.
In the following review I'll share the details about a really great solution I found. It's called Trek Pak. After a few months I have some strong opinions but if anything changes over time I'll add to this review.
before
To its credit, my Pelican 1550 has taken a beating. It’s been hauled back and forth across the country by plane, train, and automobile. It’s been hauled up crags by rope more times than I’d like to admit. On the outside it looks no worse for the wear but the inside was a different story. After years of constant use you could generally describe the inside as ‘a mess’. When I bought the case it included 2 level pick n pluck foam. This is foam that is pre-perforated in a grid so that you can pull pieces out in any shape or configuration you desire. This allows you to create a custom insert to fit around and protect your gear.
Here is a pretty good video on how it works https://youtu.be/kW20t41s824
In principal this works well but it has a few troubling drawbacks. Once you pick n pluck the foam you can’t make changes. This seriously limits the versatility. The perforated squares also tear over time and your carefully crafted shapes start to expand which decreases the snug fit around your gear. When this happens you need to replace the foam. On the bright side, they are widely available through various online retailers. On the downside a replacement costs between $50-$100 for a case the size of mine. Considering it's just foam, that's not cheap and it still doesn’t solve the long term problem. You’ll find yourself buying another replacement down the road and that irks me.
There has to be a better answer… that’s where Trek Pak comes in.
what is trek pak?
Some online research may eventually bring you around to Trek Pak. That may be how you ended up here. First you’ll have to wade through listings for more of the same foam replacements and even the velcro padded dividers. I couldn’t bring myself to buy another foam set and was about to give up when I spotted something different in a Google image search. It stood out from the rest.
Trek Pak is pretty new. In fact, they began as a Kickstarter project in 2012 raising $43,000 from over 300 backers. Since then they’ve become a full time eCommerce business. But what is Trek Pak? It’s a pin and divider organization system that either replaces the original foam or fills in blank cases. It comes in pre-sized pieces that you can buy a la carte or in preconfigured packs built for specific cases.
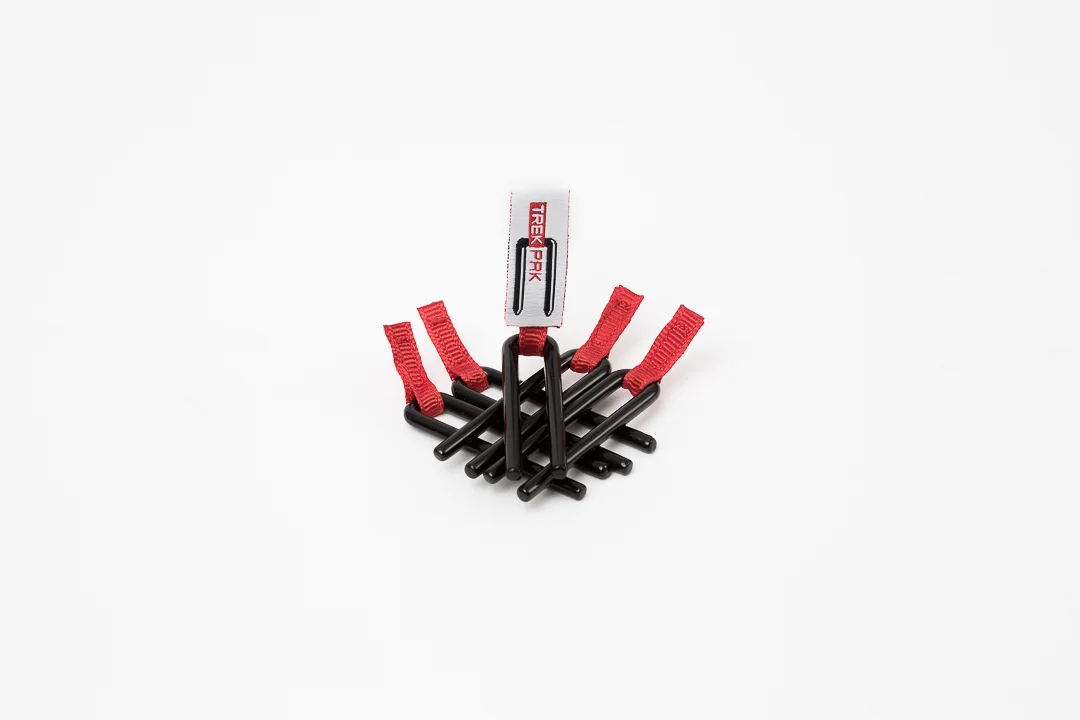
Trek Pak comes with a set of steel pins for connecting foam dividers
buying & shipping
Buying from Trek Pak was easy. Because the product is available in those preconfigured packs, I was able to quickly identify the right one and bought directly from their site. Specifically I bought the Pelican 1550 set and extra dividers just in case. Yes Trek Pak is very expensive compared to the foam replacement sets, about 3 time the price; I look at it as a long term investment that should pay for itself and reduce unnecessary headaches. My order took about 48 hrs to process and arrived at the delivery location about a week later. All in all it was a good buying experience that moved quickly on its own and without issue.
From a customer experience standpoint here is where it really stung. When buying direct from Trek Pak the shipping costs to Canada were quoted at $60 USD. That represents about a 50% surcharge for shipping. Don’t forget you have to add currency exchange to that. What!? No thanks. Fortunately I was going to be travelling to the US shortly and figured I could ship, pick up, and bring back. Unfortunately for me, I later realized that Trek Pak is also available from BH Photo Video and shipping is free to Canada for orders over $99USD meaning it could have come to my door duty free. My bad.
assembly
Putting the Trek Pak together was easy once I figured it out. It arrived with very very basic instructions which only covered how to cut the dividers and some advice to measure twice, cut once. Thanks.
I didn’t want to waste my time and money putting together a configuration that didn’t work. Through my digging around I came across an installation instruction video on their Kickstarter page. First I put down the bottom foam and installed the perimeter foam. The video also explained where the thicker side was supposed to go. Then I laid out my gear in a manner similar to how I had it in the original foam (I knew this worked well for me). Finally, Like the instructions said, I measured twice and cut once. The included cutter tool works really well and is easy to use making clean cuts. The included pins are sturdy and fit snugly into the cavities of the divider foam.
Trek Pak's divider and pin system
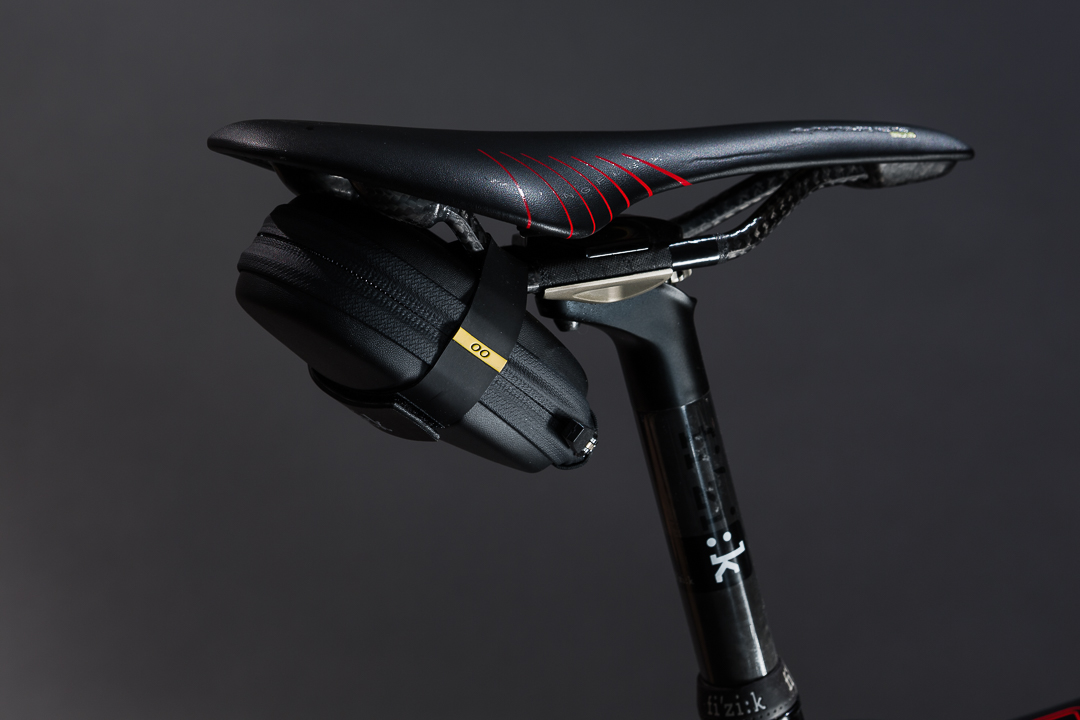
after
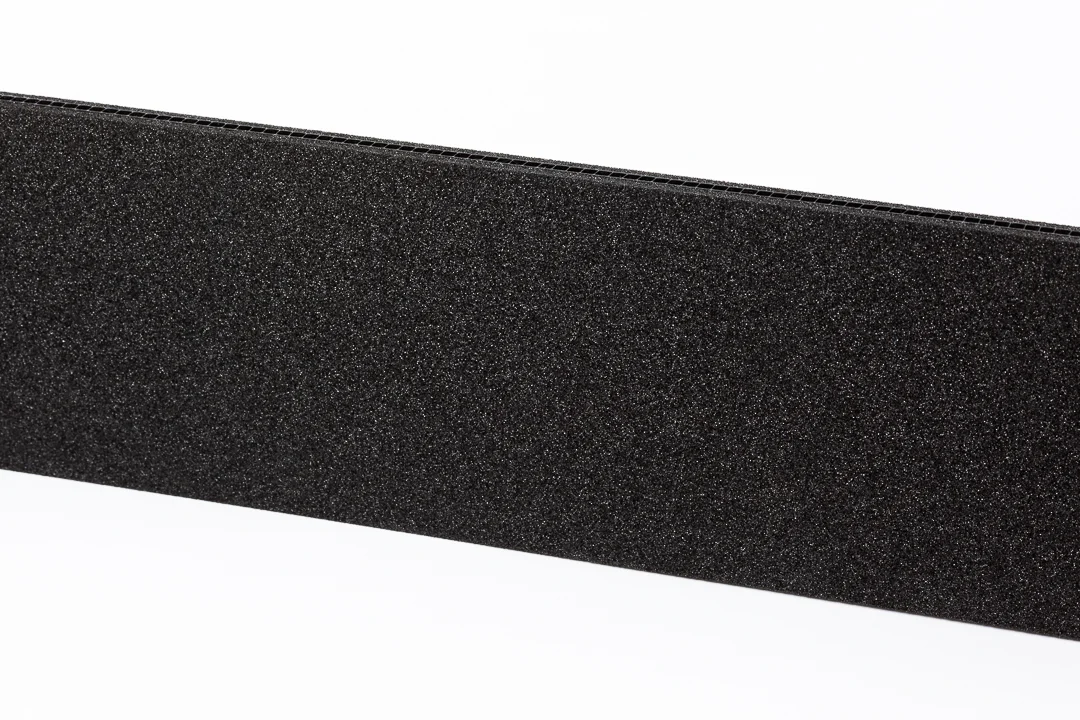
Thanks to the Trek Pak system installed, the new state of my Pelican 1550 case is clean, professional looking, and everything is very secure. The perimeter and divider materials is a plastic I-Beam construction laminated to high density foam that is apparently impervious to water. I have no plans to test that claim. I think the plastic core is key here. It gives the high density foam much needed extra rigidity. It's obviously important to how the pins connect the dividers too.
For my layout I went with a grid system that puts my camera front and center to access when I open the case. My lenses and flashes go down the sides. My camera sits in a space that fits it with a variety of lenses due to a divider I can adjust up and down depending on the lens attached. I fill around the camera with spaces for accessories. Compared to the before pictures, you can see that I’ve gained a bunch of extra space. This has only added to the usability of my Pelican 1550 case. I can have more equipment on hand and I’m not embarrassed to leave it propped open in the studio or on location.
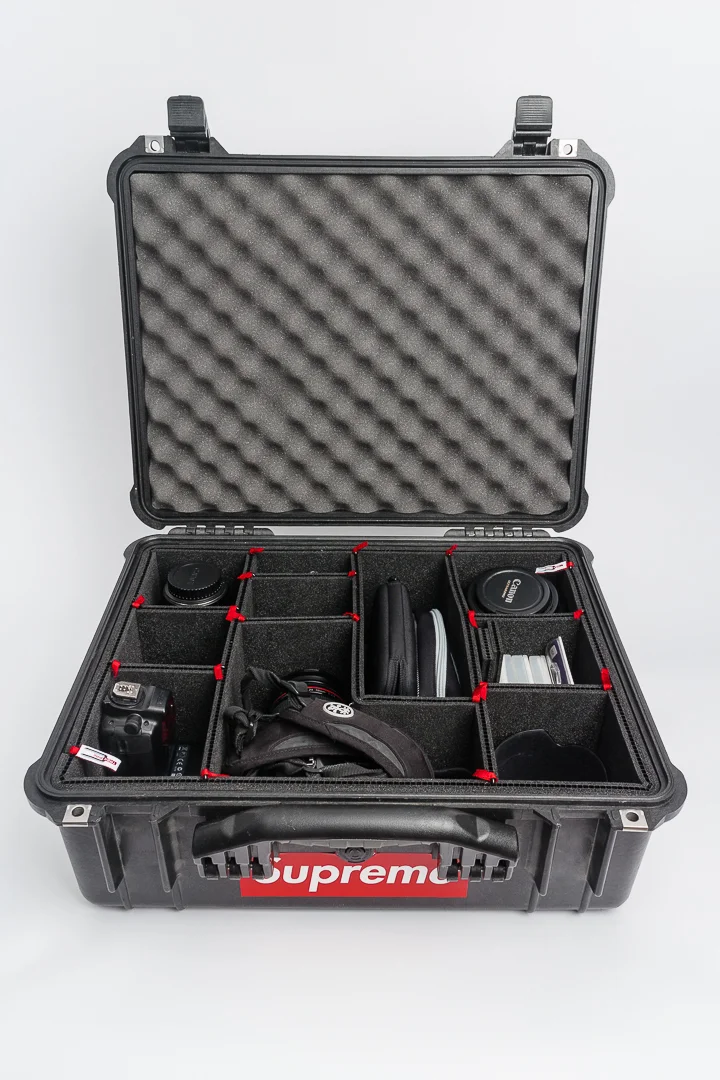
My Pelican 1550 case all cleaned up and organized with the Trek Pak installed.
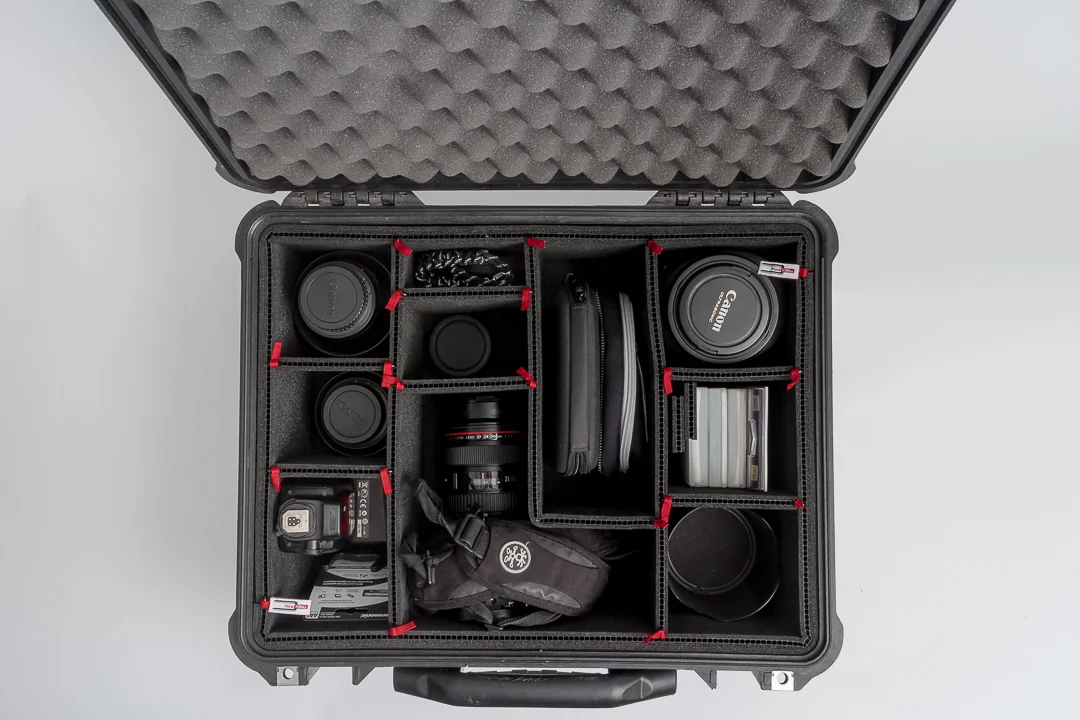
Closer look at the improved storage and layout of the Pelican 1550 with a Trek Pak installed.
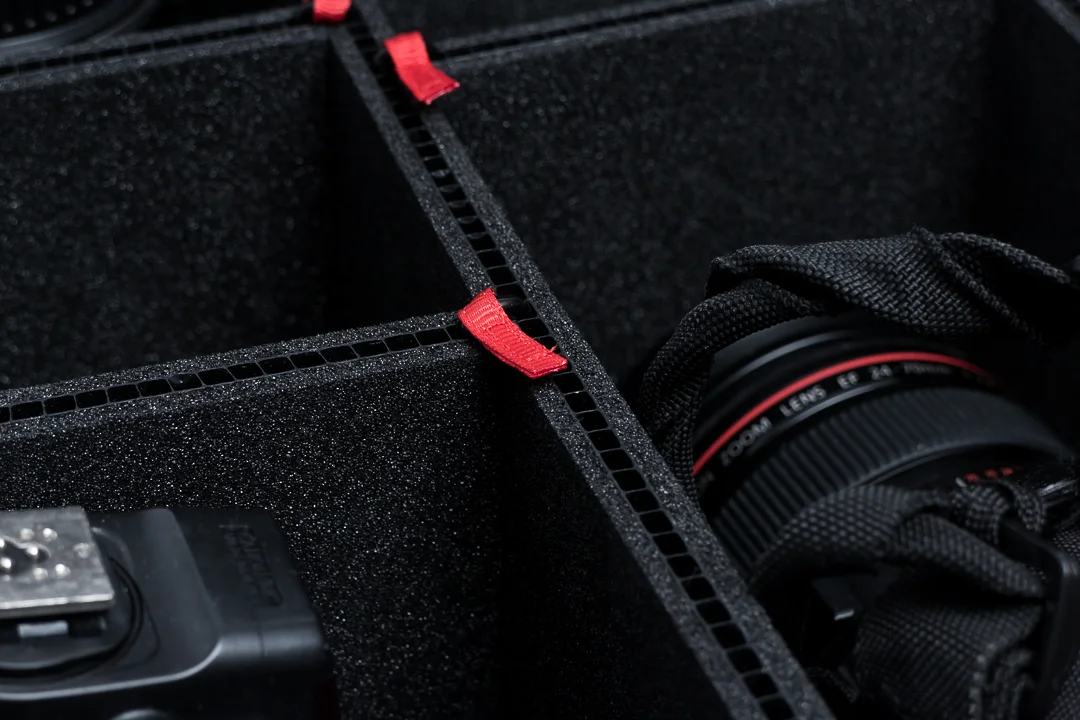
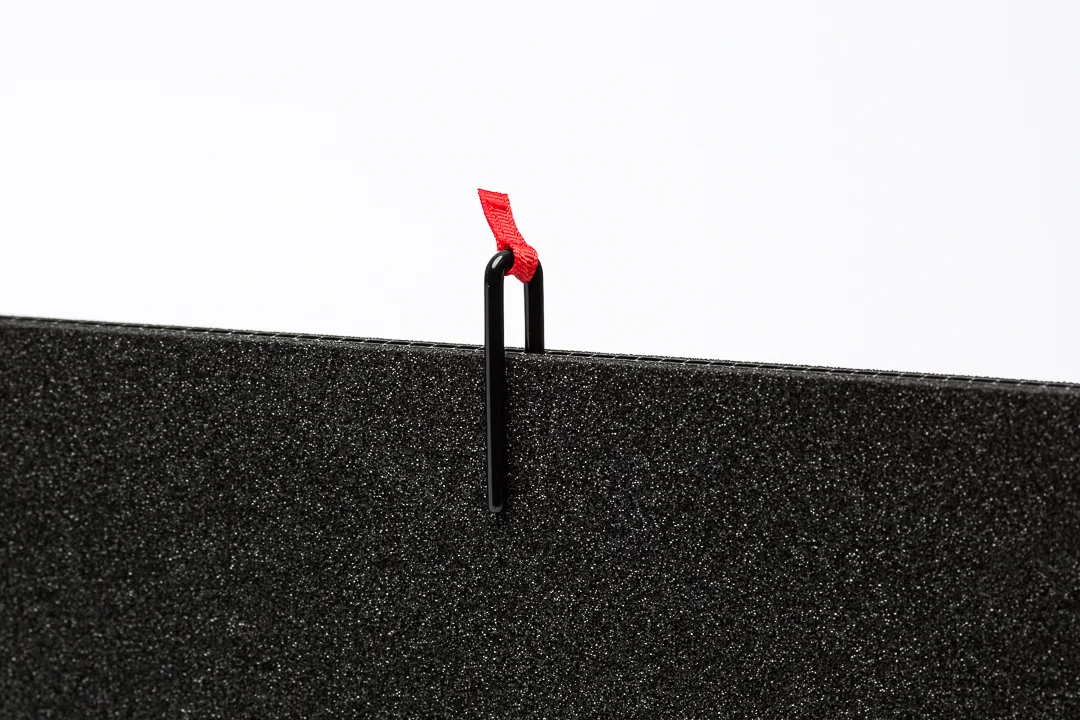
Detail view of the Trek Pak tab system
critiques
By now you’ve probably picked up on the fact that I’m pretty keen on the Trek Pak. Yet it’s not entirely perfect. From a commercial design perspective it’s great, but as a finished and packaged product I’ve got a few comments;
1. As a customer it would be very handy to have more detailed instructions included with the purchase. Having to hunt them down online isn’t ideal.
2. The possibilities for layouts are limitless but Trek Pak could be very helpful in providing some layout suggestions for key use cases like photography, audio, etc. Better yet, it would be great if Trek Pak created a way for customers to design layouts in a tool and then share them.
3. Needs more pins. The preconfigured pack I bought came with 20 pins included which was just enough for the layout of my gear. For a few extra bucks it would be better to have more included in the package price rather than an add on.
4. Packaging for shipping needs to be improved. By some of the photos on their social media pages it looks like much of the shipping may still be a small business operation. My Trek Pak was shipped as loose parts in a standard sized cardboard box. It had some air pillow stuffing inside but when it arrived the box looked worse for wear. It was half crushed and torn. Thankfully nothing inside was damaged.
bottom line
The Trek Pak is highly versatile and adaptable to a near infinite set of requirements. Yes it costs about 3x more than replacement pick n pluck foam, but it’s a small investment compared to the contents you've put into your Pelican case. If I needed to, or get another Pelican case, I would buy a Trek Pak again… but I would look to buy from a local retailer to avoid shipping costs and issues.
resources
Trek Pak product promotional video