The Perfect Project: Part 2

In part 1 of 'The Perfect Project' series I covered the initial consultation and fit that started my journey to building a forever bike. The focus was on why it is important to find the right partners in a fitter & frame builder as well as where it all begins. Here in part 2 I'm going to cover the next step in the journey. The development of the custom geometry.
Does custom geometry make for a better fit? In absolutely every way, yes. Custom geometry is an opportunity to not just build a bike that fits you but one that suits exactly how you like to ride. It's so much more than just a saddle position and cockpit. The angles, lengths, frame materials, and every last detail is all about getting it right for you. Only you. No compromises for made for anyone else. The one great caveat is that it requires trust, transparency, openness, and active participation from everyone involved.
The customer needs to be sure and confident about what they want because anything the customer holds back is only going to be their loss. But while the customer needs to be clear and direct, they must also be open to change. It's important that they trust the advice of their new partners. Why? It's the experienced knowledge of the fitter and builder that will help form and mold a geometry which achieves the ideal ride characteristics. It's ok to put your faith in them. As I moved through this important stage in the process I kept reminding myself of that. Here's my own personal reflection.
My Requirements
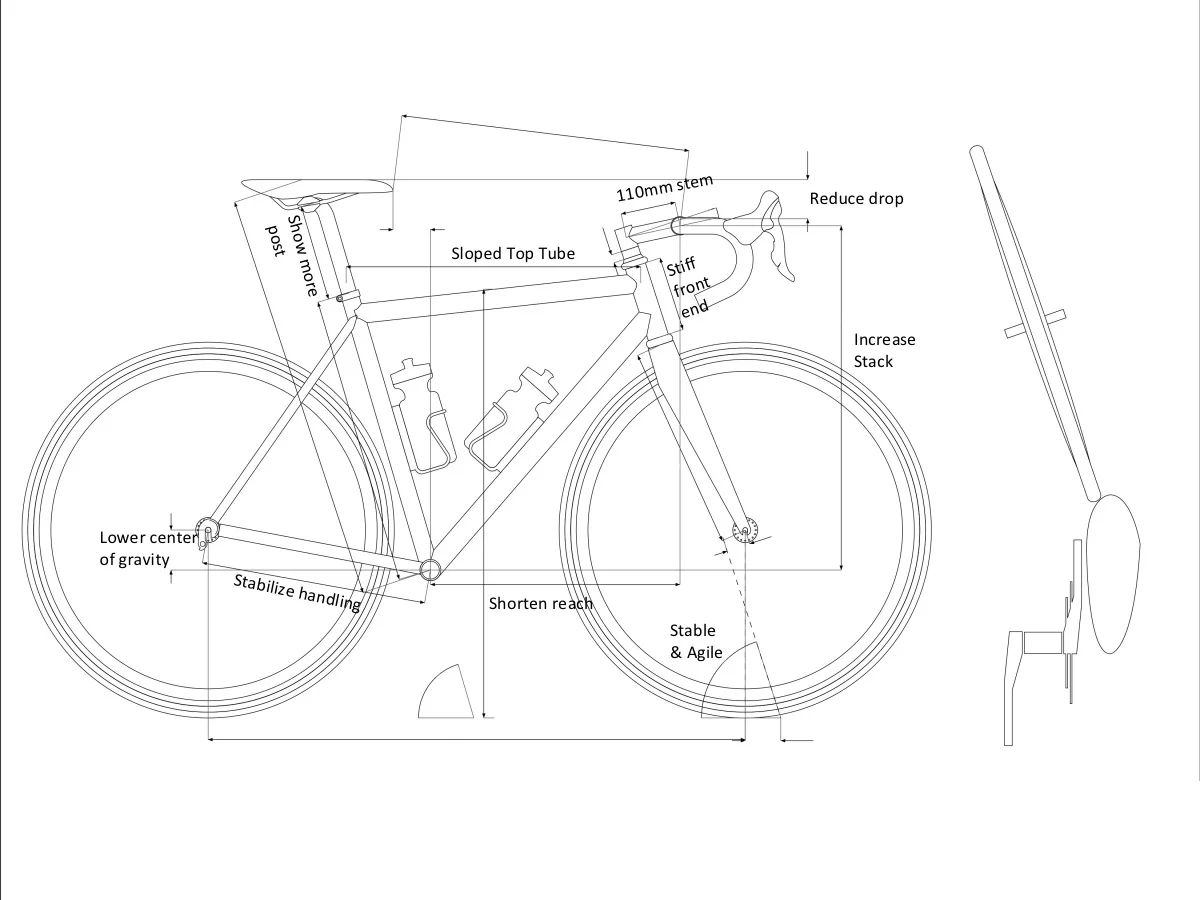
A bike fit chart that represents what my requests may influence in the custom geometry
As I get older, the way I'm riding bikes is changing fast. In the past few years I've busted and reconstructed a shoulder, blown a knee, and then had two kids. Add to that, I'm only getting older. The good news is that I am at least getting smarter about my strengths, weaknesses, and true needs. I have come to accept that my endurance for suffering is still an advantage but I'm slowing down as a sprinter. I will never ever be a good climber.
In being honest with myself about what my dream bike should be I know it's a bike that I'd love to ride today but will still make me smile in 10 years. To build a forever bike it would critical that I express this in a few succinct requirements so before this whole journey began I sat down to list out what I wanted. This is what I put together.
- Comfortable, stable, and agile
- Lower position into the bike (aka less racy)
- Room for wider tire clearance
Rough and tough this list represented a few important changes to my historical fit that would alter the stack, reach, and angles. It was going to get interesting.
Geometries Sent , Geometries Received, and Geometries Finalized
Getting all the angles and sizes right was not a first swing home run. It shouldn't be. It's a beautiful process. The specs from the initial fit that were sent to Mosaic could be described as a pretty aggressive change from my current setup. Once Mosaic took a look, they sent back their interpretation which was pretty close while staying true to my 3 requests. When we mocked up this v1 geometry on the Juteau Cantin Bike Tool the immediate feeling was great. The stack and reach were on point but there was one problem. For some reason I felt really constricted around the bottom bracket. It was hard to make a clean and fluid pedal stroke. To keep me in the same position but find more space in the bottom bracket, Blacksmith made a few small tweaks to the seat tube angle, head tube, as well as the slope and length of the top tube. Again these went back to Mosaic who put them into CAD to flush out version 2. A last minute change to increase the head tube diameter to 44mm meant a final version 3 was updated because the new headset would affect the head tube length.
Fitters Perspective by Blacksmith Cycle
After a quick physical examination, we started our fit session by looking at Jeremy's current bike position, with the goal of discussing what we liked, and what we didn't. We also sat down with our monocles on and examined the geometries of his past bikes to nail down how they fit, how they handled, and what we wished to retain from each of those bike experiences
What we realized Jeremy is looking for is a race bike that would be just slightly de-tuned, so to speak, with some additional stability and versatility to handle his more, er...fatherly duties. This translates to a slightly slack head tube angle, lower bb height, and a barely-raised head tube. All key elements in this new "relaxed-race" geometry design.
Once we were satisfied with the general direction we were taking, we mocked up our adjustable fit bike to match my initial suggestions. That way we can verify whether those assumptions transfer to a new position, or whether we need to go back to the drawing board again. I like to give our builders about 90% of what they need...that way they imbue the design with their own sense of style and fit ethos.
In the end, we were able to design a bike with Jeremy's needs in mind - something that retained the agility of his carbon race bikes, while also providing a more comfortable position on the bike that would be suitable for both short snappy efforts, and longer epic rides, a true all-rounder.
The Builders Perspective by Mosaic Bespoke Cycles
Once Mike sent me Jeremy's fit numbers, desired ride quality and characteristics, I started the design by putting the key contact points into our design software. We start by locating the saddle and the handlebars based on the coordinate provided. This helps me understand where the rider will sit in relation. Once I have those in place, I start working on other geometry points- head angle, seat angle, bottom bracket drop- all elements that play into how the bike will handle and feel. And then I work on the aesthetics- how does the bike look. Adjusting the top tube angle, the seat tube height, head tube length, spacers. And once it was ready, I sent it off for review by Mike and Jeremy. And then we iterate, making small changes until it's just right. And only once everyone is in agreement do we begin the building process.
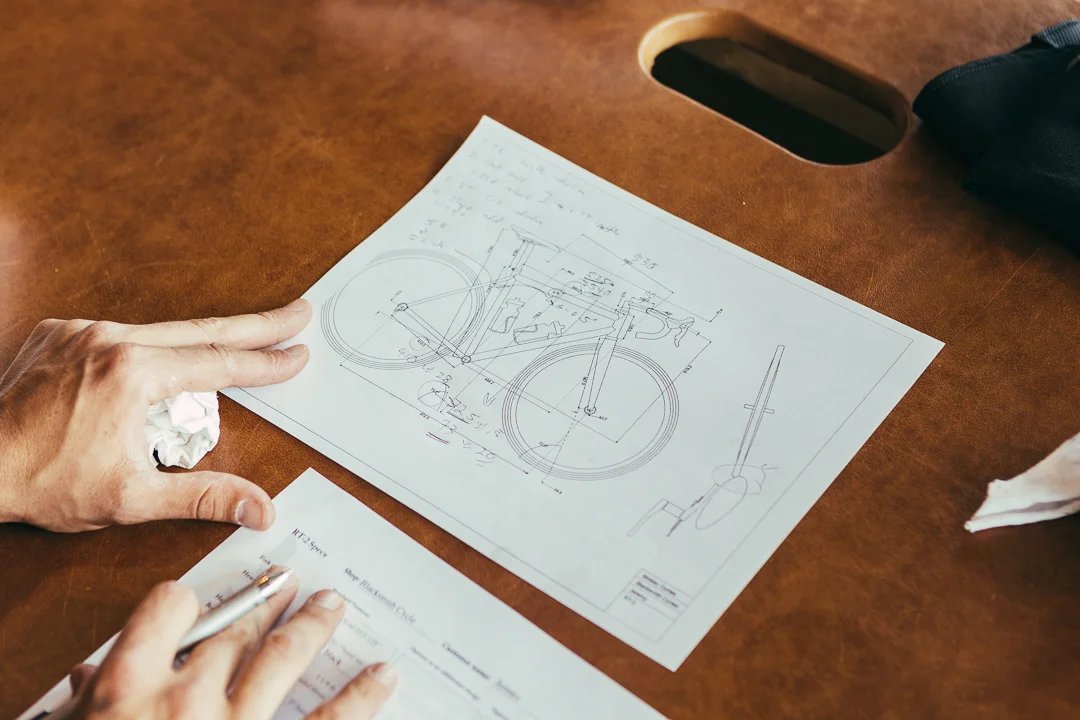
Below is a breakdown of some important angles and lengths that make up this beautiful design and how they will work together to deliver my forever bike. A Mosaic RT-1.
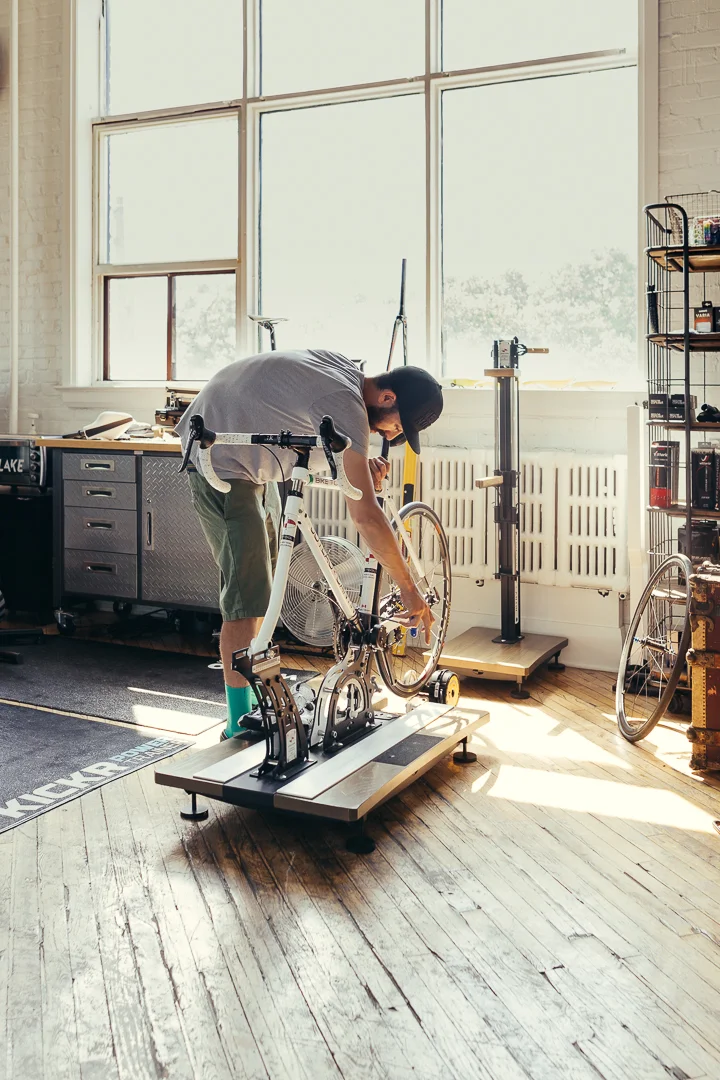
Shop owner and fitter, Mike sets up the Juteau Cantin with Mosaic's updated geometry.
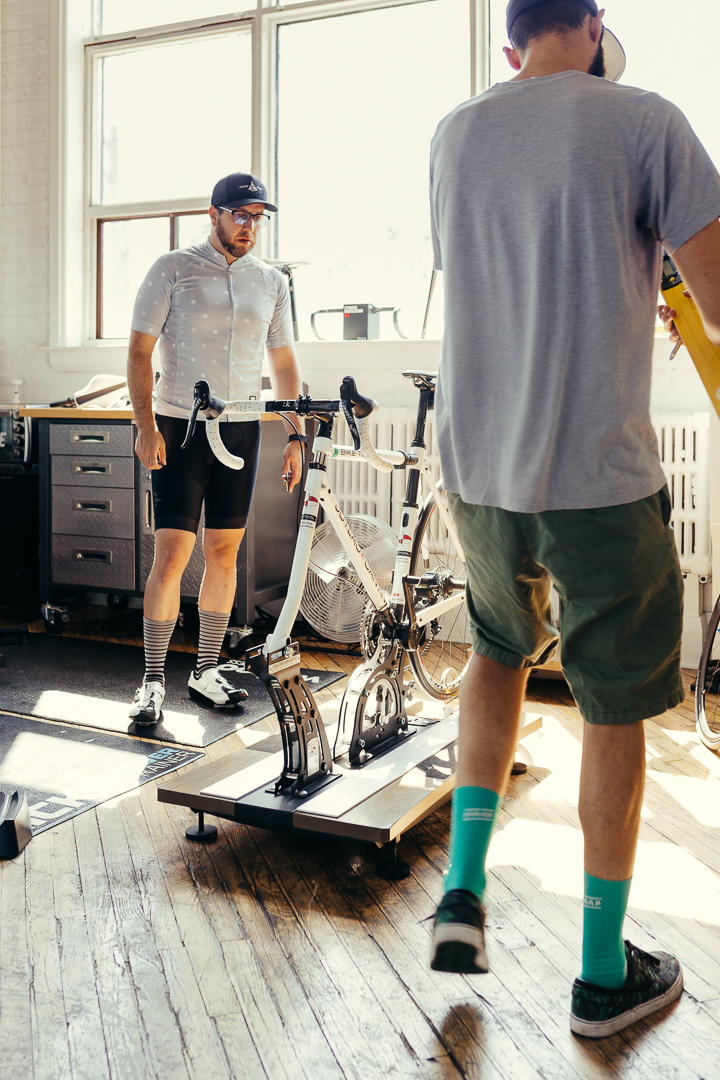
My first look at the what will soon become my forever bike.

The final mockup. Perfection.
Stack
Getting a 'lower position into the bike" and being "comfortable" meant that I want the bike to have a slightly more upright position. I didn't say Fondo! But getting myself into a less racier position is not about just shortening the stem and adding some spacers. The back and forth between Blacksmith and Mosaic created a geometry that would increase the frame stack while also dropping the bottom bracket. These two changes help sit me deeper into the bike with a lower my center of gravity for the improved stability and confident handling I asked for. The net resulting effect is a cockpit which is a bit higher up to me and a reduced saddle drop.
What is stack? The vertical distance in height between the center of the bottom bracket and the top center of the head tube.
What is bottom bracket drop? The vertical distance in height between the center of the bottom bracket and the center of the rear hub.
What is saddle drop? The vertical distance in height between the nose of the saddle and the center of the bar.
Reach
Beyond the vertical position of the cockpit (stack), there were two important "comfortable" considerations to the horizontal position of the cockpit (reach). It is important to me to that the final build use a 110mm stem because I enjoy the handling and steering characteristics of this particular size. To make this work and keep that slightly more upright, less full out racing position, Blacksmith and Mosaic set a shorter effective top tube. They said that if I need to, I can easily move out to 120mm or come back to 100mm as my fitness changes.
What is reach? The horizontal distance in length between the center of the bottom bracket and the top center of the head tube.
What is effective top tube length? The horizontal distance in length between the top center of the seat tube and the top center of the head tube in a vertical plane.
Angles
Stack and reach are critical parts to the proper fit of any bike. But it's only part of the story. Often and unfortunately overlooked are the angles of the seat tube, head tube and slope of the top tube. The angles play a big part in how the ride will handle (its agility). Some people call this the personality of the bike. In the recent past I've ridden bikes with head tube angles ranging from 71.7 * to 73.5*. While a 72.5* degree head tube angle may be a strong blend of comfort and agility for my riding today, Blacksmith and Mosaic stuck with slightly slacker 72 degrees to meet my long term needs that I set out as a requirement.
A flat top tube does offer greater stiffness but the final 7* sloping top tube allows the final setup of my 74cm saddle height to show more seat post. The additional exposed seat post will allow for a bit more flex and comfort. The 73.5* angle of the seat tube angle was dictated by my fit position over the pedals on a setback seat post.
The outcome of the second fit session makes for some new revisions to the geometry.
Next steps
If you've made it this far you can clearly see how involved but rewarding the experience can be. Throughout the first two parts of 'The Perfect Project' it's been clear how a perfect bike for me is shaping up and how both the fitter and builder have been attentive to the 3 requirements I put into this. I have a feeling that no matter how beautiful this thing rides I'll always remember how much fun it has been to go through the process.
What's Next?
Now that the geometry is set and approved we await our spot in the build queue. That time is going to be spent finalizing the components and aesthetics that will make up the final build.


